10 Effective Exercises To Do Without Equipment

August 12, 2020
You can gain strength and improve your fitness using no-equipment exercises to create an intense workout. If you are currently following a workout program from a personal trainer, you might use these exercises for your workout on the days when you don’t have access to the recommended equipment.
When trying out new bodyweight exercises, it’s important to get your technique correct so that you get the full benefit of the exercise.
Show me how to do:
Exercises you can do without equipment
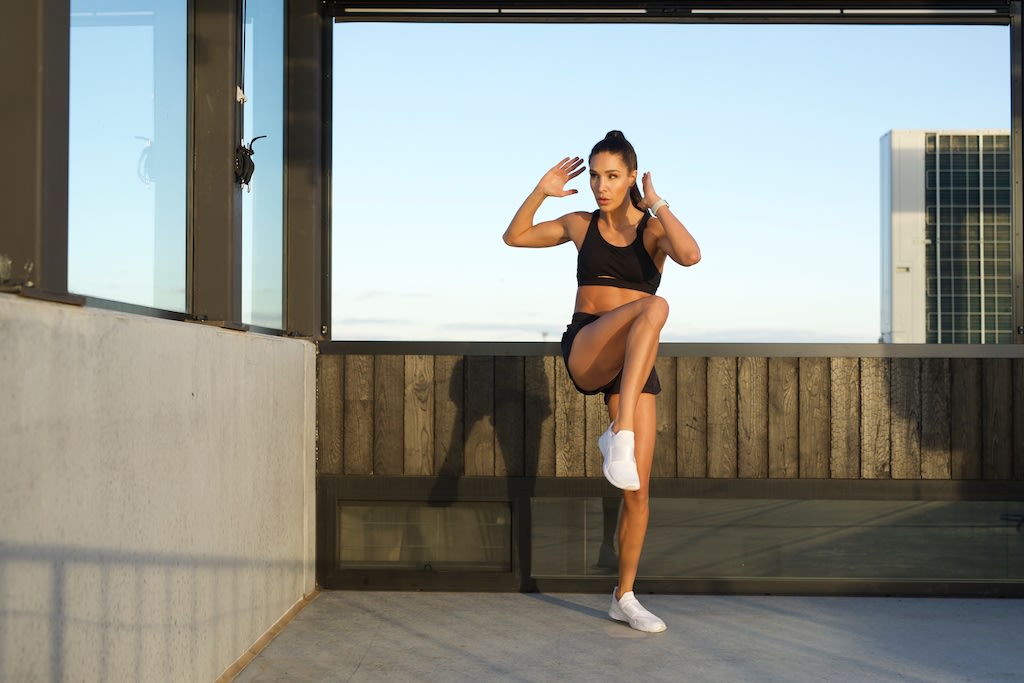
To help you to reach your workout goals anytime, anywhere, SWEAT Trainer Kayla Itsines demonstrates the correct technique for these no-equipment exercises.
Try them for yourself to mix up your training and add an element of fun to your workout!
Standing X Crunch
If you’re doing an outdoor workout, whether it’s in your backyard or a local park, you might not want to do your ab exercises on the ground. This exercise will effectively work your entire core — no crunches or lying down necessary!
20 SECS
Begin standing with both feet on the floor shoulder-width apart. Place both hands behind your head. Gently draw your ribs to your hips to engage your core. This is your starting position.
While keeping your right leg extended, bend your left knee and draw it in towards your chest. At the same time, rotate your torso to the left to bring your right elbow to your knee.
Untwist your torso and extend your left knee to return to the starting position. Immediately bend your right knee and draw it in towards your chest and rotate your torso to the right to bring your left elbow to your knee.
Untwist your torso and extend your right knee to return to the starting position. You should feel tension in your core and obliques throughout this exercise.
Continue alternating between sides, and maintain control of your breathing throughout.
Broad Jump & High Knees
This high-intensity exercise rolls two popular calisthenics exercises into one, for a cardio challenge that will keep you focused! Combining these two exercises works well when you have a small space to work out in, because you’ll keep returning to your starting position.
Begin by planting both feet on the floor shoulder-width apart. Gently draw your pubic bone to your belly button (engage pelvic floor). This is your starting position.
Inhale. Swing your arms backward and, at the same time, bend at both the hips and knees, ensuring that your knees remain in line with your toes. Continue bending your knees until your upper legs are parallel with the floor. Ensure that your back remains between a 45- to 90-degree angle to your hips.
Exhale. Swing your arms to propel your body upwards and forwards, once again, landing in squat position. Ensure that you maintain ‘soft’ knees as you land to prevent injury.
Inhale. As you extend your legs, transfer your weight on to your left foot, and bend your right leg to bring your knee into your chest. Lower your right leg and plant your foot on the floor. Keeping your weight on your right leg, bend your left leg to bring your knee into your chest.
Once you are comfortable with this movement, increase your speed so that you are hopping from one foot to the other.
Continue alternating between left and right legs, at the same time moving backwards, until you return to your starting position.
You should feel tension through your quads, glutes, and core throughout this movement.
Continue alternating between broad jump and high knees.
Air Skipping
No jump rope handy? Try air skipping instead! The advantage of air skipping is that you can do it anywhere — even if you have a low ceiling or lights that hang low enough to get in the way of your workout.
Stand with both feet on the floor, close together with your arms extended by your sides. This is your starting position.
Inhale and brace your core. Bend at the hips, knees and ankles and quickly perform a very low jump off the ground, ensuring that your legs remain extended and your feet are pointed down slightly. Land softly on the midsoles of your feet and keep your knees slightly bent at all times.
At the same time as your jump, perform an imaginary skipping action with your wrists and arms as if jumping over a rope. Maintain a tall, neutral spine throughout the exercise, keeping your shoulders pulled back and relaxed.
Maintain control of your breathing throughout.
Kneel To Knee Up
This exercise combination will strengthen your core and legs. It’s a good option to swap for a jumping exercise like jump lunges or jumping jacks if you need to keep your workout quiet.
20 SECS
Begin in a kneeling position with your knees hip-width apart, with hands placed behind your head. Draw your shoulder blades down and back. Gently draw your ribs to your hips to engage your core. This is your starting position.
Inhale and brace your core. Looking straight ahead, transfer your bodyweight on to your left knee and bring your right foot forward into the squat position. Push through your right heel to take the weight and allow you to bring your left leg into the squat position. Your feet should be shoulder-width apart, knees in line with your toes, and thighs parallel to the floor.
Exhale. Extend both knees and transfer your weight onto your left foot. At the same time, elevate your right foot to bring your knee into your chest.
Inhale. Lower your right leg and step your right foot backwards to return your right knee to the kneeling position. Shifting your weight to your right knee, step your left foot back to return to the starting position.
You should feel tension through your quads, glutes, and core throughout this movement.
Alternate between sides.
Skaters
When you want to get a cardio workout done at home, this is a great exercise to include. It’ll get your heart rate up, work your core, plus you don’t need much space to do it.
30 SECS
Plant both feet on the floor shoulder-width apart and brace your core. This is your starting position.
Inhale. Quickly take a big step backwards with your left foot, placing it behind and outside the line of your right leg. As you plant your left foot on the floor, bend both knees to approximately 90-degrees, ensuring that your weight is evenly distributed between both legs.
When done correctly, your front knee will be aligned with your ankle and your back knee will be hovering just off the floor.
Exhale and extend both knees, transferring your weight completely onto your right foot. Step your left foot forward to briefly return to the starting position before performing the same sequence on the other side. This exercise is performed quickly and maintaining balance is key.
You should feel tension in your hamstrings, quadriceps, and glutes throughout this movement.
Repeat
Rocking Chair Burpee
Burpees are a fantastic exercise for building your strength and fitness, but you might want to mix it up from time to time. While there are lots of ways to make burpees harder, such as a burpee box jump, or easier by stepping through the exercise instead of jumping, this variation allows you to maintain the same difficulty, with a focus on your core and shoulders. Here’s how to do a rocking chair burpee:
Plant both feet on the mat shoulder-width apart. This is your starting position.
Bend at both the hips and knees to place your hands on the mat on either side of your feet, ensuring that your spine remains in a neutral position.
Jump both of your feet backwards so that your legs are completely extended behind you, resting on the balls of your feet. Your body should be in one straight line from your head to your heels. This is called high plank position.
From the high plank position, bend at the hips and knees to shift your glutes over your heels and lower your torso towards the mat. Extend your arms along the mat, sinking your chest into the position and keeping your shoulders down and back.
Press through your feet to extend your legs and return to the high plank position.
Jump both of your feet forwards in between your hands, once again, ensuring that your feet remain shoulder-width apart.
Propel your body upwards into the air. Extend your legs below you and your arms above your head. Land in the starting position, ensuring that you maintain ‘soft’ knees to prevent injury.
Repeat
Plank Dips
Ever get bored while holding a plank position? This dynamic plank variation means you keep moving throughout, and you’ll have to focus to stay balanced.
Start by placing your forearms (wrist to elbow) firmly on the mat, ensuring that your elbows are directly below your shoulders. Extend both legs behind you and elevate your hips off the mat, resting on the balls of your feet.
Brace your abdominals and ensure that your spine remains in a neutral position. This is your starting position.
Keeping your core engaged, lower (dip) your hips to the left side in an arc until they are just above the ground. In a rocking motion, return back to the starting position before lowering your hips to the right side and then back towards the starting position.
Ensure you keep pressing away from the ground through your forearms and shoulders. Try to prevent your hips from sagging throughout the movement, ensuring you are breathing deeply throughout. You should feel tension in your abdominals and shoulders during the movement.
Continue alternating between sides
Lateral Shoot Through
When you can’t get out of the house, you can still get your heart rate up with cardio at home. This exercise will really challenge (because it’s hard!) your coordination and balance, while strengthening your core and shoulders. Give it a go!
Starting on all fours on a yoga mat, ensure that your knees are below your hips and your hands are below your shoulders. Set your spine in a neutral position and draw your shoulder blades down and back. Press into the floor with your hands and toes to slightly elevate your knees so that they are hovering just off the floor. This is your starting position.
Inhale. Exhale. Release your right foot and left hand, pivoting on your left foot to open up your hips. Tuck your right knee across and into your torso to lower your right hip and rotate your torso to the left. At the same time raise your left arm directly above your head. As you reach the end of your rotation extend your right leg. If done correctly your torso and right leg should be pointing 90 degrees to the left of the starting position.
Inhale. Press into the floor with your right hand to stay elevated. Bend your right knee and raise your right hip to rotate your torso back to neutral, at the same time, lower your left arm to the floor to return to the starting position.
Inhale. Exhale. Release your left foot and right hand, pivoting on your right foot to open up your hips. Tuck your left knee across and into your torso to lower your left hip and rotate your torso to the right. At the same time raise your right arm directly above your head. As you reach the end of your rotation extend your left leg. If done correctly your torso and left leg should be pointing 90 degrees to the right of the starting position.
Inhale. Press into the floor with your left hand to stay elevated. Bend your left knee and raise your left hip to rotate your torso back to neutral, at the same time, lower your right arm to the floor to return to the starting position.
Continue alternating between left and right.
Decline Shoulder Tap
This challenging core exercise will help you to progress your strength. Core strength is an essential part of being healthy.
According to a 2016 systematic review of the literature by the Department of Sport and Health Sciences, published in Healthcare, a general exercise program that combines muscular strength, flexibility and aerobic fitness is beneficial for rehabilitation of low-back pain.
When you start strengthening your core, begin with exercises such as a plank on your knees, or crunch holds, and progress to full planks, shoulder taps and pushups. Once you have built up your core strength, you can challenge yourself with these decline shoulder taps. Here’s how to do it:
Begin by placing both hands on the floor slightly further than shoulder width apart and feet together on the chair behind you, resting on the balls of your feet. Gently draw your ribs to your hips to engage your core. This is your starting position.
While maintaining a neutral spine, release your right hand and reach across your body to touch your left shoulder, ensuring that you brace your abdominals to keep your hips parallel to (in line with) the floor.
Lower your right hand to return to the starting position.
Release your left hand and reach across your body to touch your right shoulder, once again, ensuring that you brace your abdominals to keep your hips parallel to (in line with) the floor.
Lower your left hand to return to the starting position.
Continue alternating between right and left
Straddle Hinge
This hip hinge exercise works your hamstrings, glutes. It’s important to work opposing muscle groups to create physical balance. So when you do exercises that target the quadriceps and hip-flexors, like squats or step-ups, remember to include exercises like this that will target the hamstrings and glutes.
Begin standing with both feet on the floor slightly further than shoulder-width apart. Place both hands behind your head. Gently draw your ribs to your hips to engage your core. This is your starting position.
Inhale and without changing the angle of your knees, hinge forward from your hips. Ensure that you maintain a proud chest and that your head is an extension of your spine. You should feel tension in your hamstrings (back of your legs).
Exhale. Push through your heels and, using your glutes and hamstrings, extend your hips to return to the starting position.
Repeat.
Challenge yourself at home with exercises that don’t require equipment
When spending a lot of time at home, it’s easy to get into the habit of not moving as much as we usually would — and this can have an impact on our physical and mental health.
You can use these no-equipment exercises to move your body regularly and get your heart rate up — even in a small space. Regular exercise is important to care for your health — there are physical, mental and emotional benefits to moving regularly.
If you want to get your heart pumping, why not try a HIIT workout at home for a quick energy boost?
A more empowered you starts with Sweat, and our editorial team is here to bring you the latest fitness tips, trainer recommendations, wellbeing news, nutritional advice, nourishing recipes and free workouts.
* Disclaimer: This blog post is not intended to replace the advice of a medical professional. The above information should not be used to diagnose, treat, or prevent any disease or medical condition. Please consult your doctor before making any changes to your diet, sleep methods, daily activity, or fitness routine. Sweat assumes no responsibility for any personal injury or damage sustained by any recommendations, opinions, or advice given in this article.
Fitness