10 Of The Best Bodyweight Exercises To Transform Your Training

March 30, 2020 - Updated November 6, 2023
At Sweat, we know you can have an incredible full-body workout with bodyweight exercises alone. That’s why you’ll find them in Sweat programs such as OG Kayla and PWR Zero. Whether you’re a beginner or more advanced, it’s worth having a few bodyweight exercises up your sleeve to create an effective workout at home, at the park, in the gym or while you’re on holiday.
One common misconception about bodyweight exercises? That they’re easy. While many bodyweight movements definitely tick the beginner-friendly box, many bodyweight moves will challenge you to the max, like pull-ups, decline push-ups and handstands.
To celebrate the fact your body is an amazing piece of workout equipment, we’ve rounded up the 20 best bodyweight exercises for beginners through to more seasoned gym-goers. Get ready for an effective way to work your entire body and improve strength, stability and mobility. After all, all you need for a killer workout is YOU.
What are bodyweight exercises?
They’re exactly what they sound like: exercises performed using the weight of your body. These movements rely on your weight as resistance against gravity, rather than added weight in the form of free weights or gym machines.
They can be effective at building strength and muscle, improving overall fitness, and laying the groundwork of correct form if you’re planning on progressing to more advanced weighted movements. Whether you want to try strength training at home or love fast-paced HIIT workouts, there are many variations to suit different training styles.
No matter what muscle group you’re looking to target, you’ll be able to find a bodyweight exercise. Think leg exercises such as squats and lunges, core movements like planks and crunches, or push-ups, tricep dips and pull-ups to target your upper body.

How does it compare to training with weights?
If you’re training with weights, you’ll need access to pieces of equipment such as large gym machines or free weights like dumbbells, kettlebells or barbells.
Neither option is necessarily “better” than the other as it all comes down to your individual goals and lifestyle.
Weight training is ideal for those who are serious about building strength and muscle mass, want to progress towards weightlifting goals, or prefer training that is high intensity and low impact.
If you’re a beginner or don’t have access to weights, bodyweight training is a great way to build up a solid foundation and master your form. It’s also a great tool to help you improve movement patterns and joint range of motion.
If you’re wanting to build muscle without weights, progressive overload is key. This means regularly increasing the difficulty of your exercises to challenge your muscles. Some examples of progressive bodyweight training include:
Starting with push-ups on your knees before progressing to your toes, tricep push-ups, decline push-ups, or spider push-ups.
Starting with air squats before progressing to Bulgarian split-squats or pistol squats.
Increasing your number of reps.
While you can experience the many benefits of strength training with both weighted and bodyweight exercises, you might choose to add weights to your workout if you’re looking to build muscle more effectively or love how lifting heavy makes you feel.
Styles of bodyweight training
Calisthenics
While bodyweight training is a broad umbrella term, calisthenics refers to bodyweight strength training specifically. There are a number of movements you won’t need equipment for, such as squats, push-ups and lunges, making this a great style for beginners or if you’re training at home. If you want to progress further, you can use pull-up bars, resistance bands and gymnastics rings.
Bodyweight cardio
Most forms of cardio training, such as running, walking and dancing, will only use your bodyweight - making cardio a versatile and accessible bodyweight exercise. While you can include equipment (such as a bike or skipping rope), any cardio session is a great way to get your heart rate up!
Suspension training
This form of bodyweight strength training uses suspension straps. The straps are attached to a wall, ceiling, pull-up bar or squat rack and are used to do suspended exercises. You can do basic exercises like push-ups and squats, using the straps to support your body, or challenge your strength with variations like performing push-ups with your feet floating in the handles.
Plyometrics
Plyometric exercises are sometimes referred to as jump or plyo training and include movements such as burpees, box jumps and bench hops. These exercises are all about power, speed and coordination and play a big role in Kayla Itsines’ programs such as OG Kayla and High Intensity with Kayla.
Yoga
Yoga can be used to strengthen your body, improve flexibility and prioritise your mind-body connection. While it’s a powerful standalone practice, you can also include yoga sessions alongside your regular workout routine. More intense practices like Vinyasa improve flexiblity and build full-body strength while gentler styles like Yin focus on restorative poses. You can find both styles of training in the Sweat app.
Pilates
Pilates is a low-impact style of resistance training that can help build strength and stability. While you might find dumbbells, a Pilates ball, or hand or ankle weights in a Pilates session, there are plenty of no-equipment, bodyweight options too! During Pilates, you’ll focus on the principles of breath, concentration, centring, control, precision and flow.

The benefits of bodyweight exercises
From convenience and accessibility to helping you progress towards your fitness goals, there are so many reasons to include bodyweight exercises in your routine!
You can work out at home
One of the biggest perks of bodyweight training is you can do it anywhere, anytime. Try a no-equipment workout or program on holiday, in your living room, outdoors or at the gym.
It's perfect for beginners
If you’re new to working out, bodyweight exercises are a great place to start. Without the added weight from free weights or exercise machines, you can learn correct form with a lower risk of injury and still feel challenged. Once you’ve mastered your form, you might choose to progress to weighted training or find new ways to progress and keep things interesting with bodyweight movements.
You’ll get stronger
Think you need weights to build strength? This is a common fitness misconception! While you may not necessarily build muscle as effectively or quickly as you would by consistently lifting weights, bodyweight exercises will help to improve your overall strength.
Improves balance, coordination, flexibility and motion
Learning to control your movements during bodyweight exercises will help to improve your overall athletic performance and everyday movement patterns. Bodyweight exercises typically engage your core muscles, helping to maintain good posture and keep your balance.
You can also use bodyweight exercises to improve your mobility by moving through a full range of motion or trying exercise variations, such as squats with a rotation to improve your hip and thoracic mobility.
Plenty of variety
With so many bodyweight exercises to choose from and a variety of progressions available, there is always something new to try!
Best bodyweight exercises
While there are many bodyweight exercises to choose from, some are best for beginners, and others are more advanced. You also can mix and match if your upper body is stronger than your lower body, or vice versa!
Bodyweight squats
This is a simple exercise that can be done anywhere. Bodyweight squats are excellent for beginners and work on your glutes, quads, hamstrings and core all at once. When you feel confident with bodyweight squats, you can challenge yourself by adding a jump at the top of the movement or an extra pulse at the bottom of your squat.
Stand with your feet shoulder-width apart, then bend at both the hips and knees, ensuring that your knees remain in line with your toes and aiming for your upper legs to be parallel to the floor while keeping your chest forward.
Push through your heels to stand. Repeat.
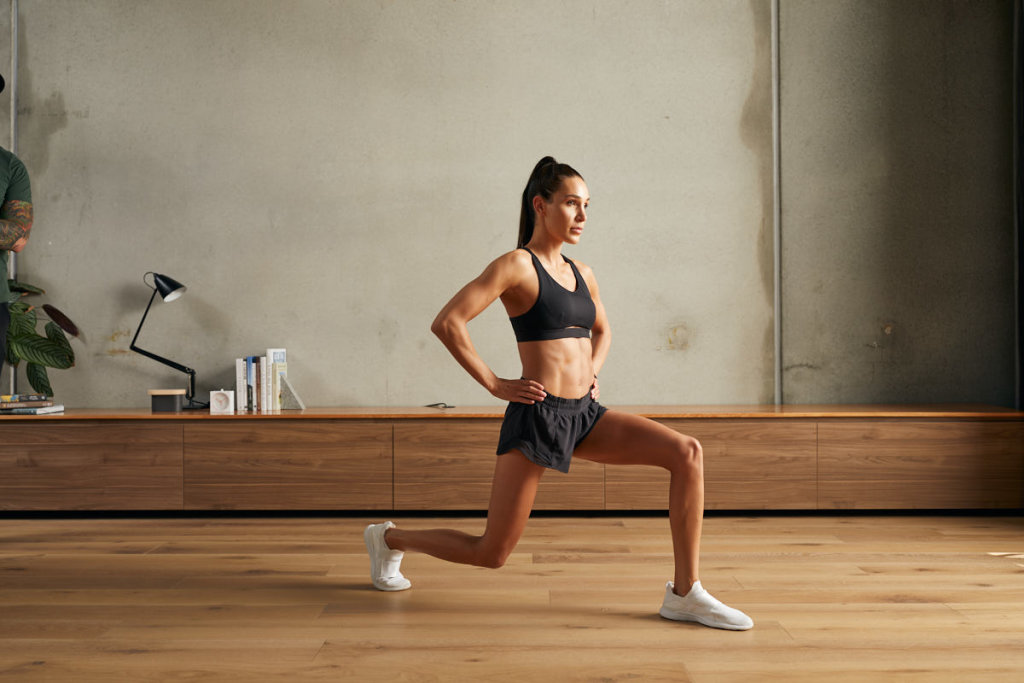
Walking lunges
This is a great leg exercise that improves your strength while also increasing mobility and balance. If you don’t have enough room for walking lunges, stationary forward or reverse lunges are great, too. If you want to progress to a more challenging variation, you can also perform jumping lunges on the spot.
Standing with your feet slightly further than shoulder-width apart, take a big step forward with your left foot into a lunge position, bending both knees to approximately 90 degrees. Your front knee should be above your ankle and your back knee should be hovering just off the floor.
Push through your left foot and toe of your right foot to rise up to standing and step forward with your right foot, bending both knees to approximately 90 degrees - back into your lunge position.
Continue alternating between left and right as you walk forward in a lunging motion.
30 SECS
Mountain climbers
This cardio movement engages your arms, legs, core and shoulders to work your whole body. Mountain climbers get your heart rate up while improving your overall body strength.
Start in a high plank position with your hands on your mat shoulder-width apart with your feet together behind you, resting on the balls of your feet.
Bring your right knee in towards your chest.
Extend your right leg to return to your high plank position.
Bring your left knee in towards your chest.
Extend your left leg to return to your high plank position. Continue alternating between right and left, increasing your speed to a running motion if you feel confident.
30 SECS
Planks
This core movement utilises an isometric contraction to strengthen your core.
Start by placing your forearms (wrist to elbow) firmly on the mat, ensuring that your elbows are directly below your shoulders.
Extend both legs behind you and elevate your hips off the mat, resting on the balls of your feet.
Engage your abdominals and ensure that your spine remains in a neutral position. Hold this position for the specified time or as long as you can, breathing throughout.
There are also plenty of plank variations to progress your strength and have fun with this exercise. You could try:
Side planks, where you rotate your torso to the side and have your bodyweight resting on one forearm
Plank jacks, where you jump your feet in and out in a basic plank position
Shoulder taps, where you hold yourself in a high plank position on your hands and alternate between tapping your left and right shoulder.
Push-ups
If you're struggling with push-ups, start here with our top tips! You can start this exercise on your knees and eventually progress to your feet or other variations such as plyo push-ups or spider push-ups once you become stronger.
Place both hands on the mat slightly further than shoulder-width apart, feet together on the mat behind you while resting on the balls of your feet.
While maintaining a neutral spine (think straight line from neck to knees or toes), bend your elbows and lower your torso towards the mat until your arms form two 90-degree angles.
Push through your arms and chest to straighten your arms and lift your body off the ground. Repeat.
45 SECS
Deadbugs
The key to this exercise is ensuring you keep your back in a neutral position throughout the movement and ensure your core is engaged to avoid injury. Imagining you have a cup of water on your back that you don’t want to spill can help avoid arching or twisting!
Lie on your back on a yoga mat with your arms extended directly in front of your chest. Bend your knees and bring your legs into tabletop position with your knees stacked over your hips, and your shins parallel to the floor.
Lower your left arm backwards toward the floor, close to your head, while straightening your right leg towards the floor at the same time. Draw your belly button towards your spine to keep your core engaged.
Raise your left arm and right leg to return to the starting position.
Switch sides, lowering your right arm and left leg towards the floor at the same time.
Raise your right arm and left leg to return to the starting position. Continue alternating between left and right sides.
Pull-ups
This challenging exercise requires a considerable amount of strength in your back, lats and core. If you’re nervous about trying unassisted pull-ups, use a long resistance band to assist in lifting yourself up to the bar. The instructions below are for an assisted chin/dip machine, but can be modified to suit what you have available. For chin-ups the movement is the same, but your hands are in an underhand grip (palms facing towards you) to target slightly different muscles.
Standing on a box in front of a bar or the footrests of the machine, hold onto the handles or bar with an overhand grip (palms facing away from your body), hands slightly further than shoulder-width apart. Step your feet off the footrests or box one leg at a time, and extend your arms so that you are hanging.
Bend your elbows and pull your body upwards to bring your chin up and over the handles or bar.
Slowly extend your arms and lower your body to return to the starting position. Repeat.
Burpees
This is a Sweat favourite that will get your heart pumping and work your entire body. If burpees aren’t for you, there are plenty of alternatives!
Standing with your feet shoulder-width apart, bend at both the hips and knees to place your hands on the mat on either side of your feet.
Jump both of your feet backwards so that your legs are completely extended behind you in a high plank position, resting on the balls of your feet.
Jump both of your feet forwards to land just behind your hands.
Stand up and propel your body upwards to jump into the air.
Land softly with bent knees, and bend down to place your hands on the floor for your next burpee! Repeat.
Tuck jumps
This explosive movement will get your heart rate up and build your muscle power and coordination!
Stand with your feet slightly further than shoulder-width apart, bend at both the hips and knees into a squat position, ensuring that your knees remain in line with your toes and your chest stays up.
Push through your legs to propel your body upwards and jump into the air, bringing your knees towards your chest.
Land softly in a squat position with bent knees to protect your joints. Repeat.
Bench dips
This movement primarily strengthens your triceps, chest and shoulders. If you don't have a bench (or two), you can also use a chair or any stable surface and keep your feet on the floor as you build your strength.
Begin seated on a bench with your hands on the edge of the bench under your glutes with your fingers facing forwards. Place your feet on top of a second bench with your legs extended and shift your glutes forward off the bench.
Bend your elbows to lower your glutes towards the floor, keeping your shoulders, elbows and wrists in line with each another.
Once you have created two 90-degree angles with your arms, push through the heels of your hands and extend your arms to return to the starting position. Repeat.
Bodyweight training in the Sweat app
Ready to try bodyweight training? There are so many programs to choose from in the Sweat app. Why not give High Intensity Zero Equipment with Kayla, PWR Zero with Kelsey or Bodyweight Strength with Anissia a go.
A more empowered you starts with Sweat, and our editorial team is here to bring you the latest fitness tips, trainer recommendations, wellbeing news, nutritional advice, nourishing recipes and free workouts.
* Disclaimer: This blog post is not intended to replace the advice of a medical professional. The above information should not be used to diagnose, treat, or prevent any disease or medical condition. Please consult your doctor before making any changes to your diet, sleep methods, daily activity, or fitness routine. Sweat assumes no responsibility for any personal injury or damage sustained by any recommendations, opinions, or advice given in this article.
Fitness